Tuning Tips for the Melges 14
Learn how to apply the Harken Blockheads tuning decal on the Melges 14 to create repeatable settings next time you hit the water. Featuring John Pearce, US Sailing Youth Director.

Learn how to apply the Harken Blockheads tuning decal on the Melges 14 to create repeatable settings next time you hit the water. Featuring John Pearce, US Sailing Youth Director.
Follow along as John Pearce, US Sailing Youth Director, applies the Harken Blockheads tuning decal on a Laser to create fast, repeatable settings.
Laser sailors know that active control line adjustment is crucial to fast sailing. As a result, it’s important to identify and address potential friction points in the control systems that can lead to reduced efficiency and performance. In this video, learn where these friction points are and why applying a dry lubricant such as McLube® Sailkote can be a lifesaver when you’re out on the race course.
Follow along as John Pearce, US Sailing Youth Director, applies the Harken Blockheads tuning decal on a Club 420 to create fast, repeatable settings.
You can use the photos below to supplement the video:
A. Tie a line to the jib tack pin.

B. Bring the line back through the fairlead and cleat-off as if it were a jib sheet. This will give you the theoretical tightest trim angle the jib would see.

C. On both sides of the boat, locate the point along your piece of line where the middle of the jib foot would be when trimmed. Place a strip of electrical tape on the deck, parallel and to the outside of the line. Using the tuning decal as a ruler, place it perpendicular to the tape so that the outside edge of the tape aligns with the number 1 mark on the decal. From here, place two more strips of electrical tape at the number 3 and number 5 marks, aligning the outside edges of each with the marks.

D. These three strips will help you to define baseline jib trim positions.

A. Take the horizontal strip of the tuning decal and adhere it to the boom along the outhaul line just immediately aft of the outhaul cleat.

B. Adjust the outhaul to roughly half-way between the max ease and max trim you would see. Using a marker or piece of tape, mark the outhaul line at the tuning decal’s number 5 mark. From here you can record settings as the outhaul is trimmed and eased, using the number 5 as your middle point.


A. Using the vertical strip of the tuning decal, adhere it to the mast along the jib halyard purchase. When doing this, set the jib halyard tension to medium and then place the decal so that the number five is right next to the top of the block.

B. Using the top of the block as your marker, you can now record and repeat heavy and light jib halyard trim settings.

This is the first episode in a new video series that teaches you how to use a Harken Blockheads Tuning Decal to create repeatable settings for your dinghy.
In this episode, John Pearce, US Sailing Youth Director, applies the tuning decal to an Opti to create a measurement system for raising and lowering the sprit halyard.
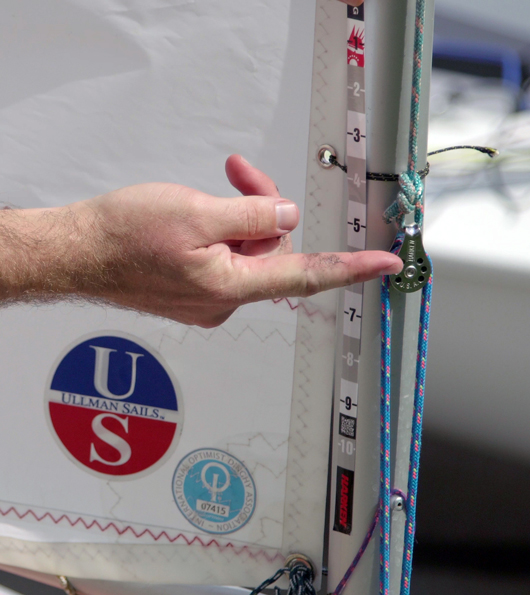
Place the tuning decal on the mast so that it sits in the middle of the range that the block will move.

In this example, when eased, the top of the knot sits right around the 3 inch marker.

In this example, when trimmed, the top of the knot sits right around the 5 inch marker.
Learn how to ease and tension your hiking strap to adapt to changing conditions quickly. Move just one knot and you can go from loose and a full hike, to tight and in-touch with the boat.
Bungee line is popular on dinghies for uses such as keeping hiking straps taught and tidying up lines. Installing bungee can be tough however, with knots often tightening too much or slipping out over time. Thankfully there is a great piece of hardware that is perfect for securing your bungee: a hog ring.
Hog rings are made of stainless steel and are designed to be pinched shut around whatever they are securing. Learn how to properly install your bungee line using a hog ring!
Learn how to finish a splice or tidy up the end of a line by tying a whipping. This video is a follow up to Making a 12-Strand Eye Splice. Whipping is an essential process for securing the tail of a splice and preventing any slippage over time. Watch and take note as Whitney Kent of Sheboygan Youth Sailing demonstrates this step-by-step process.
Splicing can often seem like a daunting skill to learn. When done well, it more closely resembles art than a functional rigging application. Everyone, however, needs to start somewhere, and the 12-strand eye splice is an easy first project to begin your splicing career with! Watch and take note as Whitney Kent of Sheboygan Youth Sailing demonstrates this step-by-step process.
Check back next week for our follow-up video on whipping, an essential process for securing the tail of the splice and preventing any slippage over time.
Check out this video for a few quick tips on upgrading your Opti boom vang.
The sprit halyard is one of the most important sail controls onboard an Opti. The more you can actively adjust the halyard tension to match conditions, the better your boat will sail. This is why it’s super important to have a low-friction system that’s easy to adjust while you’re sailing. Check out this video featuring Blockhead ambassadors Chapman and Jack as they install the key components to optimize Jack’s Opti sprit halyard.
Here is a list of the parts you will need for this project:


In search of awesome rigging upgrades for their Optis, Blockheads Jack Goggins and Chapman Petersen joined with professional rigger Olli Lubker for a trip to Harken World Headquarters one cold day in snowy Pewaukee, Wisconsin.
First on the list was upgrading Jack’s mainsheet to an interchangeable 4:1/3:1 “quick release” system. The goal of this system is to let you quickly switch from more to less purchase (or vice versa) without untying the line. It is one of the more popular upgrades in the Opti class and can be accomplished in several ways using a variety of parts and rigging methods. While we totally encourage you to experiment and find new ways to rig your boat, we’ve chosen to focus on this simple, effective method.
Watch the video for a step-by-step walk-through of the project. Here is a rundown of the key pieces of hardware you will need:

Harken 40mm Carbo Fiddle Block with Trigger Shackle
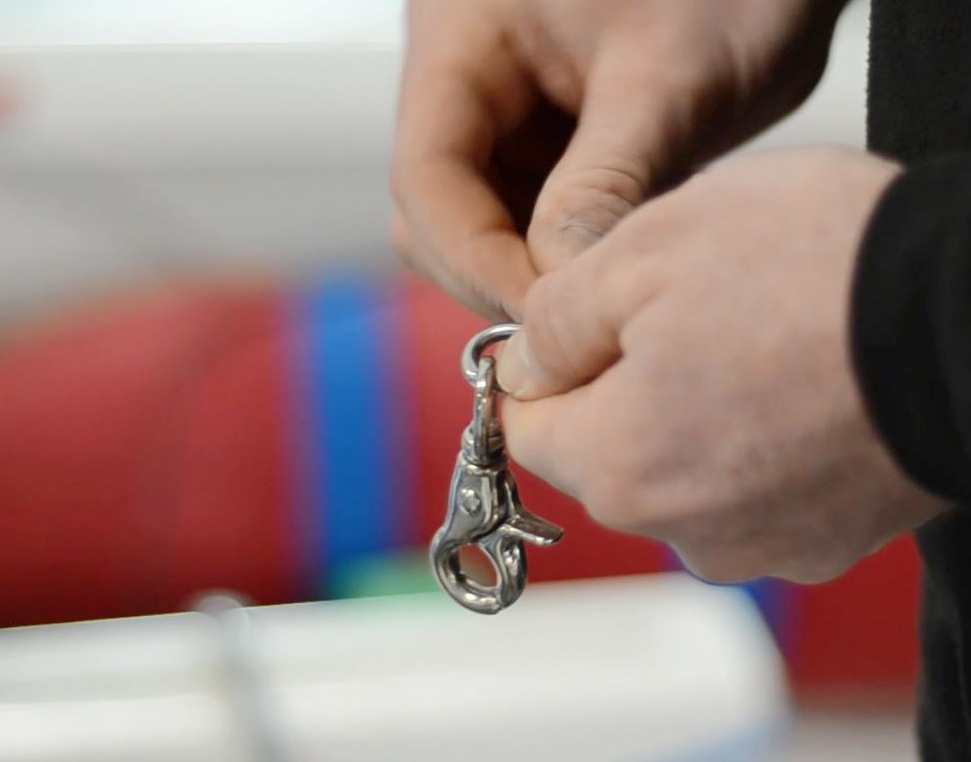
Trigger Schackle

In this video, Brian Swingly, Head Coach at the US Coast Guard Academy, John Pearce, former Head Coach at George Washington University and now Youth Director at US Sailing, and Krysta Rohde, the 2007 ICSA Singlehanded National Champion, offer a comprehensive walk through of many tips and tricks for rigging your Laser.
The more attention you can pay to these settings will put you closer in tune with the boat. It’s very important to know exactly how your boat moves and reacts in racing situations, and you can only know this with a ton of time and practice. Constantly be tweaking until you find the right balance. The sailor who puts in the most time rigging and tuning their boat will always have the extra edge!